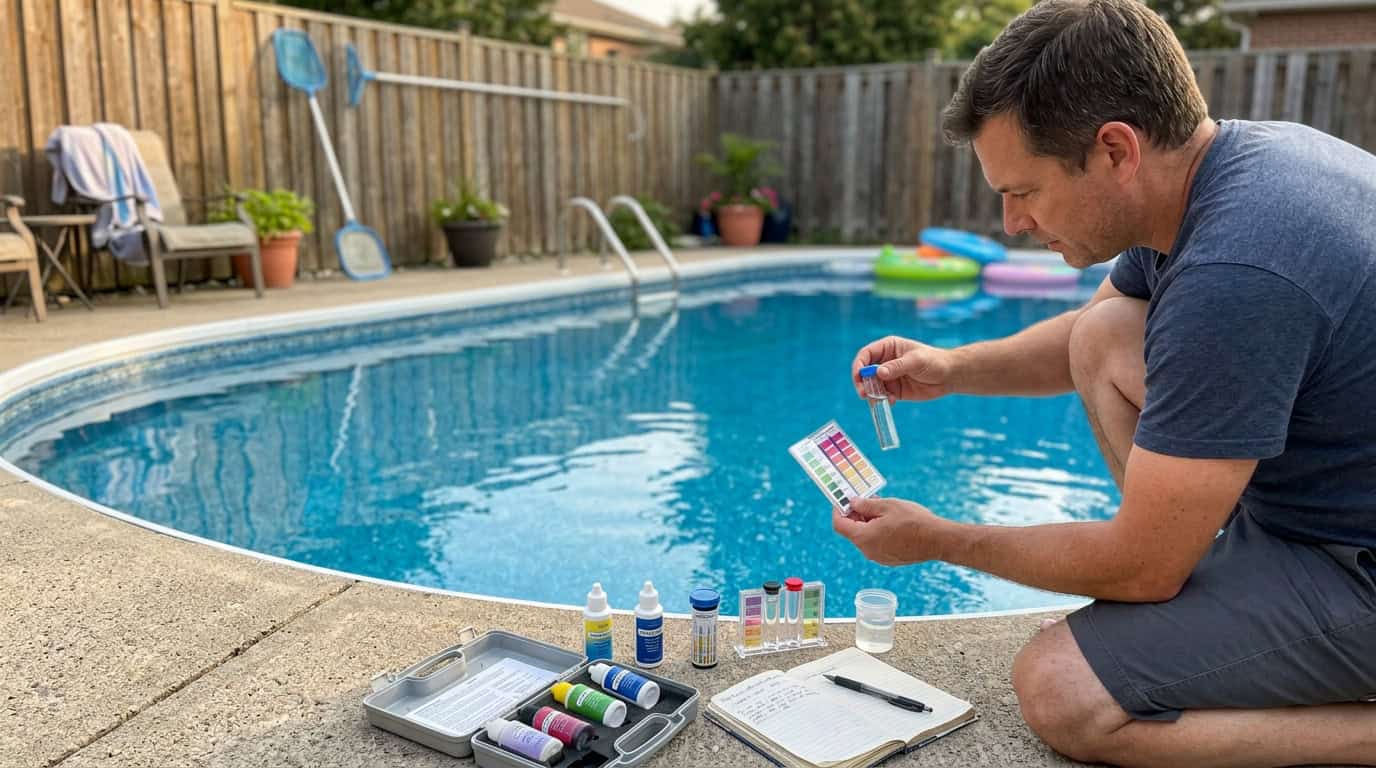
How to Test Pool Water at Home: The Complete Step-by-Step Guide (2026)
Every pool problem you’ve ever dealt with — cloudy water, algae blooming overnight, itchy eyes after a swim, white scale creeping up the waterline — started the same way: with an invisible chemistry imbalance that a simple 30-second test would have caught days earlier. By the time the problem is visible, the chemistry has already been wrong for a while.
Here’s what most pool guides don’t tell you upfront: pool water chemistry changes every single day. Sunlight burns off chlorine. Rain dilutes alkalinity and drops pH. A pool party adds nitrogen, skin oils, and sunscreen that consume sanitizer far faster than normal. None of these changes are visible until they’ve already created a problem.
Testing is the only way to know what’s actually happening in your water before it becomes a problem you have to solve. And doing it correctly at home — with the right method, the right technique, and a clear understanding of what the numbers mean — is completely achievable for any pool owner.
This guide covers everything: the four testing methods from test strips to smart digital monitors, all eight key water chemistry parameters, how to take a proper sample, how to read your results accurately, what to do when two test methods disagree, and the testing schedule that keeps your water balanced year-round without over-testing.
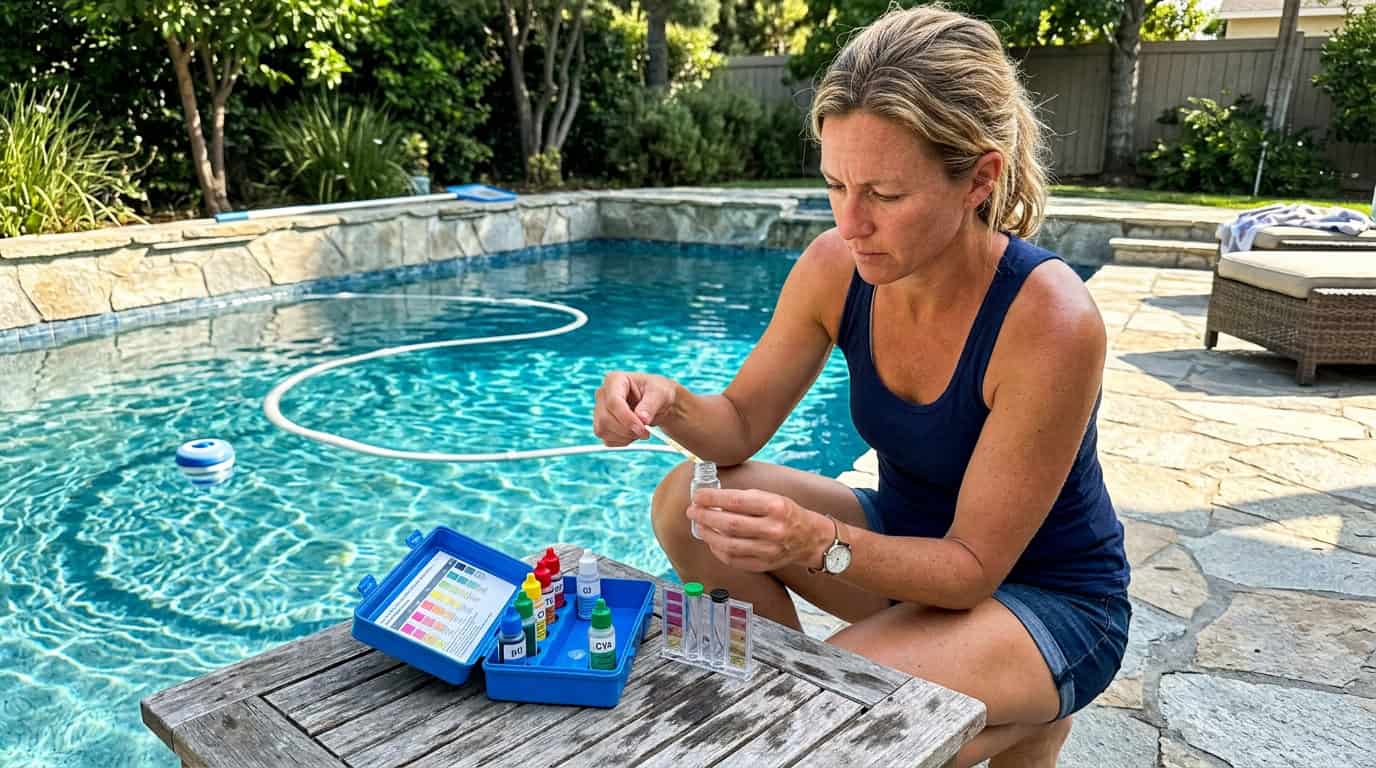
What You’re Actually Testing For — The 8 Key Parameters
Pool water chemistry revolves around eight measurable parameters. Understanding what each one does — and what goes wrong when it’s off — makes the difference between blindly adding chemicals and actually managing your water intelligently.
| Parameter | Ideal Range | Test Frequency | Why It Matters |
|---|---|---|---|
| Free Chlorine (FC) | 1–3 ppm | 2–3× per week | The active sanitizer that kills bacteria and algae |
| Combined Chlorine (CC) | <0.5 ppm | Weekly | Chloramines — the real cause of pool odor and eye irritation |
| pH | 7.2–7.6 | 2–3× per week | Controls chlorine effectiveness and swimmer comfort |
| Total Alkalinity (TA) | 80–120 ppm | Weekly | Buffers pH from swinging wildly |
| Calcium Hardness (CH) | 200–400 ppm | Monthly | Low = etches plaster; high = scaling on surfaces and equipment |
| Cyanuric Acid (CYA) | 30–50 ppm | Monthly | UV stabilizer for chlorine; too high renders chlorine ineffective |
| Total Dissolved Solids (TDS) | <1,500 ppm above fill water | Monthly / Seasonal | “Worn out” water; triggers partial drain and refill when too high |
| Salt (SWG pools only) | 3,000–4,000 ppm | Monthly | Required for salt chlorine generator output; varies by SWG model |
Not all parameters need the same attention. Free chlorine and pH are the ones that change fastest and have the most immediate impact — these get tested most often. Calcium hardness and cyanuric acid move slowly and can be checked monthly. Here’s what each one actually does.
Free Chlorine vs. Combined Chlorine — The Distinction That Changes Everything
This is one of the most misunderstood topics in residential pool care, and getting it right changes how you respond to water problems.
Free chlorine (FC) is the active, available form of chlorine in your water — the form that actually sanitizes. It kills bacteria, oxidizes contaminants, and prevents algae. This is the number you’re maintaining when you add chlorine to your pool.
Combined chlorine (CC) is chlorine that has already reacted with nitrogen-containing compounds from swimmers — sweat, urine, skin cells, sunscreen — forming chemical compounds called chloramines. Combined chlorine is essentially spent chlorine: it no longer sanitizes effectively, it irritates eyes and skin, and it produces the characteristic sharp “pool smell” that most people associate with too much chlorine.
Here’s the critical insight: the strong chlorine smell in a pool is almost always a sign of too little free chlorine, not too much. A pool that smells strongly of chlorine usually has a high combined chlorine (chloramine) level, which means you need to add more chlorine and shock the pool — not reduce it. A properly sanitized pool with healthy free chlorine levels and low combined chlorine has very little odor at all.
The goal: keep FC between 1–3 ppm and CC below 0.5 ppm. If CC climbs above 0.5 ppm, the pool needs shock treatment regardless of what your FC reading shows.
pH — The Master Control Parameter
pH is the most important parameter to keep in range because it controls the effectiveness of everything else. At pH 7.2, roughly 65% of your free chlorine is in its active, sanitizing form. At pH 8.0, only about 20% is active — meaning four times as much chlorine is needed to achieve the same sanitizing power. A pool with perfect chlorine levels but incorrect pH can still be an inadequate sanitation environment.
pH also determines swimmer comfort: below 7.2, the water is acidic enough to irritate eyes and skin; above 7.8, chlorine efficiency drops and scaling begins. The 7.2–7.6 range is the sweet spot for sanitization effectiveness, swimmer comfort, and equipment protection simultaneously.
Total Alkalinity — pH’s Buffer
Total alkalinity (TA) is the water’s resistance to pH change. Think of it as pH stability insurance. When TA is in the 80–120 ppm range, pH stays relatively stable even when you add acidic or basic chemicals, when rain falls in, or when the sun beats down all day. When TA is too low, pH “bounces” — swinging up and down rapidly and making it very hard to hold in range. When TA is too high, pH becomes locked at a high level and resistant to lowering.
Calcium Hardness — Protecting Your Pool Surface
Water naturally seeks a calcium equilibrium. If the dissolved calcium in your pool water is too low (soft water), the water becomes aggressive and pulls calcium from wherever it can find it — pool plaster, grout between tiles, concrete surfaces. This etching process is slow but destructive and expensive to repair. If calcium hardness is too high, the excess precipitates out of solution as calcium carbonate scale — the white deposits on your waterline, on spillways, and inside your heater and pump.
Cyanuric Acid — Chlorine’s Sunscreen
Cyanuric acid (CYA), also called stabilizer or conditioner, protects chlorine molecules from being destroyed by UV radiation. Without CYA in an outdoor pool, direct sunlight can eliminate 75–90% of your free chlorine within hours. With CYA in the 30–50 ppm range, that same UV exposure has a far more manageable effect and chlorine levels hold through a normal sunny day.
The catch: CYA also reduces chlorine’s effectiveness proportionally. At low CYA levels, chlorine is highly potent. As CYA increases, you need proportionally more free chlorine to achieve the same sanitizing effect. At CYA levels above 80–100 ppm — a condition sometimes called “CYA lock” — so much chlorine is neutralized that even high FC readings don’t represent adequate sanitation. The only fix is a partial drain and refill to dilute the CYA. This is why monthly CYA testing matters even though the parameter changes slowly.
Total Dissolved Solids (TDS)
TDS measures everything dissolved in your pool water — chemicals, minerals, swimmer contaminants, treatment by-products — as a cumulative total. Over time, TDS climbs as you add chemicals and water evaporates (concentrating whatever’s left). When TDS gets too high, the water becomes increasingly “used” and difficult to balance; chemical treatments become less predictable and effective. The solution is a partial drain and refill with fresh water, which dilutes the accumulated solids.
The 4 Methods for Testing Pool Water at Home
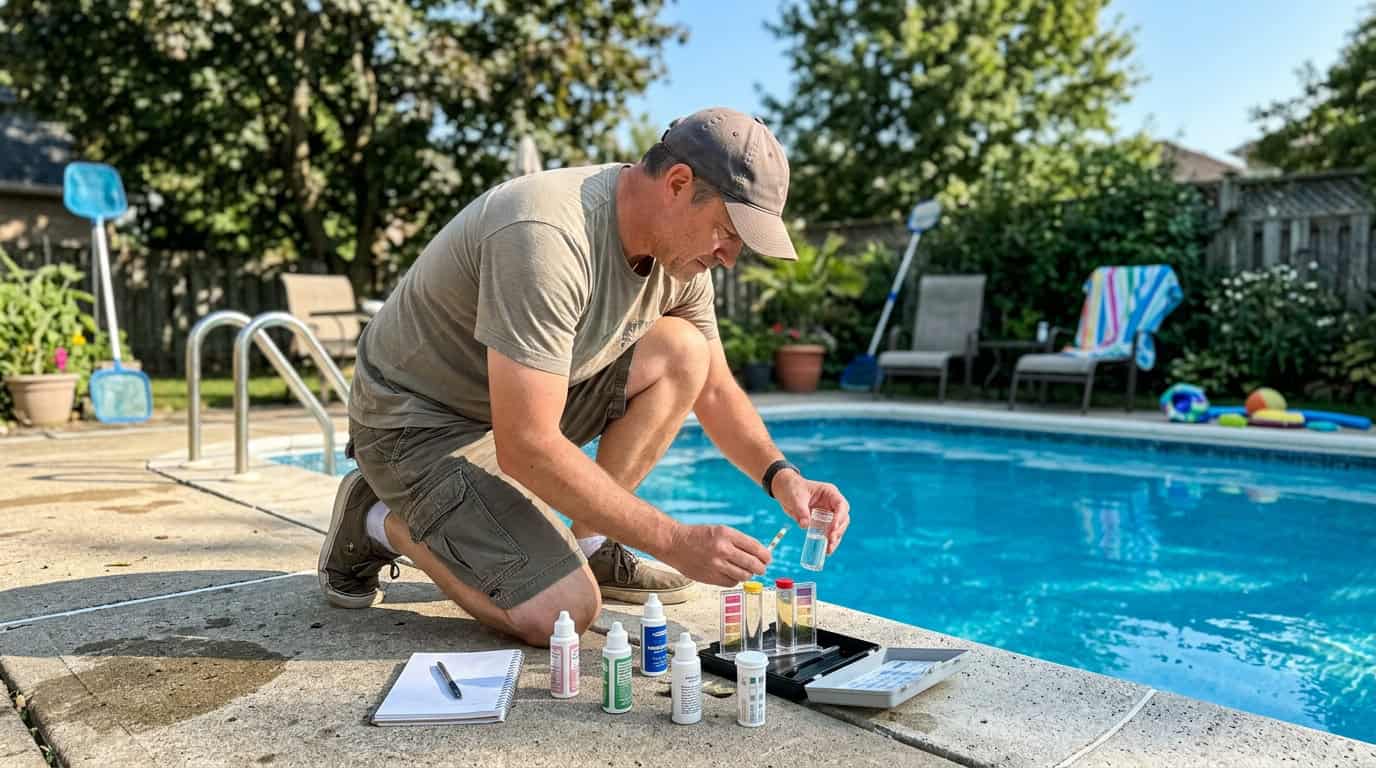
There are four distinct approaches to home pool water testing, each with different accuracy, cost, speed, and ease-of-use trade-offs. Most pool owners use more than one — a fast daily method for routine checks and a more accurate method for weekly or problem-solving testing.
Method 1 — Test Strips
Test strips are thin plastic strips with small pads impregnated with reagent chemicals that change color when they contact pool water. They’re the fastest, most convenient, and least expensive testing option — a strip takes about 15–20 seconds from dip to reading.
What they test: Most multi-parameter strips cover free chlorine, pH, total alkalinity, and cyanuric acid in a single dip. Some 7-in-1 strips add calcium hardness and bromine. Specialty strips are available for salt, copper, iron, and phosphates.
Accuracy: Test strips are accurate to approximately ±20–30% under ideal conditions. This is sufficient for routine monitoring — catching major swings in FC and pH before they become problems. For precise diagnosis of a persistent imbalance or when you’re about to add significant amounts of chemicals, upgrade to a liquid drop kit for verification.
Using strips correctly (most people get this wrong):
- Dip the strip in pool water for exactly 1 second — not longer; prolonged contact washes reagents off the pads
- Hold the strip horizontally after removal — don’t shake it or let water drip between pads, which cross-contaminates readings
- Read at the time specified on the package — typically 15 seconds; reading too early or too late changes results
- Compare the strip in shade or indirect north-facing light — direct sunlight bleaches the color pads and makes results appear lighter (lower) than they actually are; indoor artificial light distorts color matching
- Keep your fingers away from the test pads — skin oils and pH from your hands contaminate the result
Storage: Keep strips in their original container with the desiccant packet, sealed immediately after use, in a cool, dry location. Never store them poolside in direct sun or in a hot car. Moisture and UV light both pre-react the reagent pads, producing strips that show “normal” results regardless of actual water chemistry — the most dangerous form of testing error because it gives false confidence.
No products found.The AquaChek 7-Way Pool and Spa Test Strips are a solid, widely-used option for this method – 100 strips covering pH, total chlorine, free chlorine, bromine, alkalinity, total hardness, and cyanuric acid in a single dip, at roughly the accuracy and speed described above.
For colorblind users: Red-green color blindness affects roughly 1 in 12 men, making the color chart comparison on standard test strips unreliable. Digital testers (Method 3) display numeric results rather than colors and are the most accessible option. Some test strip brands now offer companion smartphone apps — you dip the strip, photograph it through the app, and the app reads the colors digitally. The accuracy depends heavily on consistent lighting conditions when photographing, but it’s a workable option for routine monitoring.
Method 2 — Liquid Drop Kits (Reagent Kits)
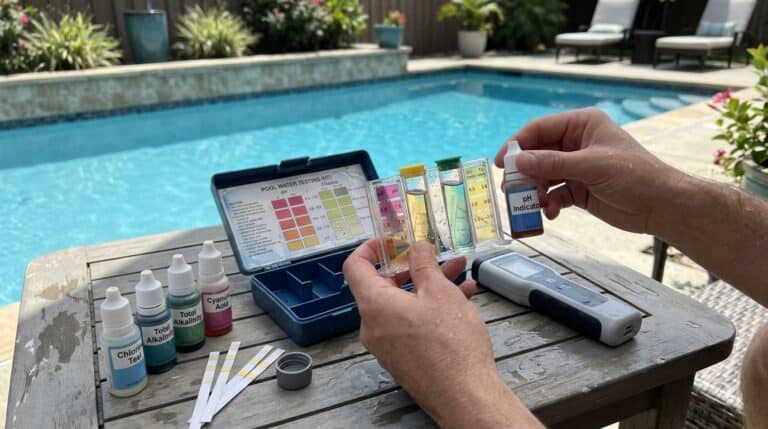
Liquid drop kits add measured drops of chemical reagents to a water sample, changing the sample’s color. You then compare that color to a reference chart, or in titration tests (like the Taylor FAS-DPD method for chlorine), count the number of drops required to produce a color change — each drop represents a known concentration. Drop kits are significantly more accurate than test strips and are the preferred method of professional pool technicians.
Recommended kits:
- Taylor K-2005: Tests FC, CC, pH, TA, CH, and CYA — the standard comprehensive home kit; sufficient for most pool owners
- Taylor K-2006: Adds FAS-DPD chlorine testing (see below) — the professional choice for accurate chlorine measurement
- Taylor K-2006C: The complete professional kit with FAS-DPD titration
The Taylor K-2005 is the standard comprehensive home kit referenced above – a complete DPD test kit covering free and total chlorine, bromine, pH, acid/base demand, total alkalinity, calcium hardness, and cyanuric acid, made in the USA by a company that has been in water testing since 1930.
Check Price on Amazon
The FAS-DPD method explained: Standard DPD chlorine tests (color comparison) become unreliable at high chlorine concentrations — the color can actually fade and appear lighter than it should, giving a falsely low reading. The FAS-DPD titration test avoids this by counting the drops of a titrant required to cause a color change to clear, multiplied by a conversion factor. This method is accurate at any chlorine concentration and is particularly important for testing after shocking a pool when FC may be very high.
Using drop kits correctly:
- Fill the test tube to the marked line at eye level, not from above — parallax error from above gives incorrect volumes
- Add drops with the bottle held perfectly vertical — tilting the dropper changes drop size and throws off your count
- Count drops one at a time and never squeeze the bottle rapidly — each drop must fall individually
- Cap the tube and swirl gently — do not shake; bubbles distort color matching
- Read the color against a white background or natural indirect light — never against a colored surface or fluorescent lighting
- Never touch the water sample with your fingers — skin acids and oils change pH readings
For colorblind users: Liquid drop kits involve more nuanced color matching than test strips and are more problematic for colorblind users. The FAS-DPD titration for chlorine is actually color-blind accessible — you’re looking for a color change to clear (from pink to colorless), which is a change in intensity rather than hue. For pH and alkalinity tests with subtle color gradations, a digital tester is the better option.
Method 3 — Digital and Smart Testers
Digital testers eliminate the color-matching guesswork of both strips and drop kits by measuring water chemistry electronically and displaying numeric results. They range from handheld single-parameter meters to floating smart monitors that continuously track multiple parameters and send data to your phone.
Types of digital testers:
Handheld digital meters (pH/ORP probes): measure pH and ORP (oxidation-reduction potential) using electrochemical sensors. These are accurate, fast, and not subject to color interpretation errors. They require periodic calibration using buffer solutions (typically every 1–4 weeks) and electrode replacement every 1–3 years.
Photometric testers (colorimeters): use liquid or tablet reagents, but instead of relying on your eyes to match colors, a built-in light sensor measures how much light passes through the colored sample and converts that to a numerical reading. This removes human color interpretation from the process entirely and is particularly useful for colorblind users. The LaMotte ColorQ and Solaxx SafeDip are examples of this type.
No products found.The LaMotte ColorQ Pro 7 is the specific photometric tester referenced above – a handheld digital photometer that measures free chlorine, total chlorine, bromine, pH, alkalinity, calcium hardness, and cyanuric acid directly on a digital display, removing color-matching from the process entirely.
Floating smart monitors: wireless devices that float in the pool continuously, with sensors that read multiple parameters and transmit data to a smartphone app. These provide the convenience of real-time monitoring without manual testing. Popular examples include the Ondilo ICO, pHin, and various 7-in-1 floating monitors.
An important limitation of smart monitors: most consumer floating monitors measure ORP rather than direct free chlorine concentration. ORP (typically 650–750 mV for adequate sanitation) is a reliable proxy for sanitizer activity but is not a direct measurement of ppm chlorine. ORP readings are affected by pH, temperature, and CYA level — two pools with identical FC readings can show different ORP readings depending on these other factors. Smart monitors are excellent for trend monitoring and alerts, but should be verified against a liquid drop kit or photometric test monthly, particularly when adjusting chemistry or troubleshooting a problem.
Calibration matters: all digital sensors drift over time. An uncalibrated pH probe can read 0.3–0.5 pH units off, which is enough to make a real problem look like perfect chemistry. Follow the manufacturer’s calibration schedule — typically monthly for ORP sensors and every 1–2 weeks for pH probes in active use.
Method 4 — Professional Pool Store Testing
Most local pool supply stores offer free or low-cost water testing using commercial-grade photometric testing equipment that’s significantly more accurate than any home kit. Pool store testing is particularly valuable for the parameters that most home kits don’t cover well — TDS, phosphates, metals (copper, iron), and a full chemistry profile that includes the Langelier Saturation Index (more on this below).
How to make pool store testing work for you:
- Bring at least 12 ounces of pool water in a clean container — enough to re-run specific tests if needed
- Collect your sample from 18 inches below the surface, away from return jets and chemical dispensers, with the pump running
- Use a clean container that has never held any other liquid if possible — pickle jars, wine bottles, and any acidic-residue containers will corrupt your pH reading
- Take your sample to the store within 30 minutes; don’t let it sit in a hot car for hours before testing
What to ask for — and what to watch out for:
When you get your results, ask for the actual numbers for every parameter, not just a recommendation. A printout that says “your pH is 7.8, add X amount of muriatic acid” is useful. A verbal recommendation to “buy this pH decreaser and this algae preventer and this phosphate remover” without specific numbers is not a test result — it’s a sales pitch. You’re entitled to the numerical readings from the machine. With those numbers, you can make your own informed decisions about what your water actually needs rather than acting on a shopping recommendation.
Use pool store testing as a monthly accuracy check on your home kit. Run your own test and then get the store test on the same water sample — comparing results shows whether your home kit is reading accurately or has drifted.
Method Comparison at a Glance
| Method | Accuracy | Cost | Speed | Best Use Case |
|---|---|---|---|---|
| Test strips | ±20–30% | Very low ($) | 30 seconds | Daily / routine FC and pH monitoring |
| Liquid drop kit | ±5–10% | Low–moderate ($$) | 5–10 minutes | Weekly testing, chemical troubleshooting |
| Digital / photometric | ±1–5% | Moderate–high ($$$) | 1–3 minutes | Precise readings, colorblind users, production environments |
| Pool store test | Laboratory grade | Free–low ($) | 15–30 minutes travel | Monthly full profile, metals, TDS, phosphates, kit calibration check |
How to Collect a Water Sample Correctly
The most accurate test kit in the world gives you wrong results if your water sample isn’t collected correctly. This step is surprisingly important and frequently done carelessly.
Step 1 — Run the pump first: run your pool pump on the high setting for at least one hour before taking a sample. Stagnant water near the surface, around return jets, or near chemical feeders is not representative of the overall pool chemistry. The pump needs to have fully circulated the water before your sample is meaningful.
Step 2 — Sample from the right location: collect your water from approximately elbow depth — 12 to 18 inches below the surface. Surface water picks up airborne contamination, has more UV exposure, and doesn’t represent the bulk of your pool water. Avoid sampling near return jets (where freshly recirculated or freshly chlorinated water exits), near the skimmer (where concentrated surface debris and algae accumulate), and anywhere near a floating chemical dispenser or chlorine feeder.
Step 3 — Rinse the vial first: rinse your test tube or container with pool water before filling it for the test. Residue from the previous test, manufacturing residue, or any water other than pool water in the container will interfere with your results.
Step 4 — Fill correctly: for reagent drop kits, fill the tube to the marked fill line with the tube at eye level, reading horizontally — not from above, where parallax makes the fill level appear higher than it is. For test strips, simply dip the strip; don’t fill a separate container unless the instructions require it.
Step 5 — Test promptly: test the sample immediately after collection. Pool water chemistry begins changing the moment it leaves the pool — exposure to different temperature and air causes off-gassing and chemical shifts. Don’t collect a sample in the morning and test it in the afternoon.
Step 6 — Read in the right light: this step is consistently mentioned in professional guidance but almost never explained clearly in beginner guides. Direct sunlight bleaches the color pads on test strips, making results appear lighter — which translates to artificially low chemical readings. Indoor fluorescent or warm LED lighting distorts the color spectrum in ways that make color matching on both strips and drop kit comparisons inaccurate. The ideal reading environment is natural indirect light — shade on a bright day, or north-facing daylight (which is neutral color temperature) without direct sun hitting the strip or tube. If you’re testing indoors, use a true daylight LED bulb or position near a north-facing window.
Step-by-Step: Using Each Testing Method
Test Strips — Step by Step
- Collect a water sample at elbow depth, away from return jets
- Remove one strip from the container and immediately reseal the container
- Dip the strip into the water for exactly 1 second, fully submerging the pad end
- Remove the strip and hold it horizontally — do not shake off excess water
- Wait the time specified on your particular strip’s packaging (typically 15 seconds) without moving the strip
- Compare each pad to the color chart in shade or indirect natural light, starting with the pads furthest from your fingers
- Record your results immediately — don’t rely on memory
Common mistakes: Leaving the strip in the water too long (washes reagent off). Shaking the strip after removal (mixes water between pads). Reading in direct sunlight (bleaches colors to appear lower). Reading after more than 30 seconds (colors continue to develop and give falsely high readings).
Liquid Drop Kit — Step by Step
- Rinse the test tube with pool water, then fill to the marked fill line at eye level
- Add the specified number of reagent drops, holding the bottle perfectly vertical so each drop is the same size
- Count drops one at a time — never squeeze two drops simultaneously
- Cap the tube and swirl gently 3–4 times. Do not shake vigorously; bubbles distort the color
- Wait the specified development time (typically 30–60 seconds)
- Hold the tube against a white background or white reference card in indirect natural light
- Compare the sample color to the chart provided in the kit. Read the tube at eye level
- For titration tests (FAS-DPD chlorine): add drops one at a time counting carefully until the color changes to clear. The number of drops × the conversion factor = your reading
Common mistakes: Tilting the dropper bottle (changes drop size). Shaking the tube (bubbles). Reading against a colored surface (distorts color perception). Touching the sample with fingers (contaminates pH reading). Adding drops too quickly and losing count.
Digital Tester — Step by Step
- Verify the tester was last calibrated within its recommended interval (check the manual — typically monthly)
- Rinse the probe or chamber with distilled water, then with your pool water sample
- Collect your water sample in the provided chamber or hold the probe at the correct depth in the pool
- Wait for the reading to stabilize (the display will stop changing — typically 15–60 seconds depending on the sensor)
- Record the displayed reading
- Rinse the probe with distilled water after testing and store as directed (pH probes should be stored in storage solution, not dry)
Common mistakes: Skipping calibration (an uncalibrated pH sensor can read 0.3–0.5 units off, which has significant real-world implications). Storing a pH probe dry (destroys the glass membrane). Reading before the display stabilizes. Not rinsing between measurements on different water samples.
Testing Schedule — By Parameter and By Trigger Event
By-Parameter Frequency Schedule
| Frequency | Parameters | Why This Frequency |
|---|---|---|
| Daily | Free Chlorine, pH | Only during first month of pool ownership, after adding new chemicals, or during heavy use / hot weather periods; otherwise 2–3× per week is sufficient |
| 2–3× per week | Free Chlorine, pH | Standard ongoing schedule during swim season; these two parameters change most rapidly |
| Weekly | Combined Chlorine, Total Alkalinity | CC reveals chloramine buildup before the pool starts smelling; TA shifts gradually but needs weekly monitoring to catch before it destabilizes pH |
| Monthly | Calcium Hardness, Cyanuric Acid, TDS, Phosphates, Metals (copper/iron) | These parameters change slowly; monthly testing is sufficient to catch issues before they become serious |
| Seasonal (opening / closing) | Full profile including LSI calculation, Salt (SWG pools) | Complete baseline test before the season begins and before winterization |
Event-Trigger Testing Guide
Scheduled testing catches gradual drift. Event-trigger testing catches the sudden shifts that scheduled testing would miss entirely — and these are often the situations that turn into expensive problems if not caught quickly.
| Event | Test These Parameters | Why This Event Matters |
|---|---|---|
| Significant rainfall | pH, Total Alkalinity, FC | Rainwater is naturally acidic (pH 5.0–6.0) and dilutes both alkalinity and chlorine. Even 1 inch of rain on a typical residential pool can drop TA by 10–20 ppm |
| Heavy bather load (pool party, frequent swim days) | Free Chlorine, Combined Chlorine | Nitrogen compounds from sweat and other swimmer-introduced contaminants consume FC rapidly and raise CC; may need shock treatment within hours |
| After adding any chemical | The parameter you were adjusting + pH | Wait 4–6 hours with pump running, then test to confirm the chemical had the intended effect and didn’t over-correct or create a secondary imbalance |
| After shock treatment | Free Chlorine, Combined Chlorine | Don’t allow swimming until FC drops below 5 ppm; test daily after shocking to track FC decline and confirm CC has been eliminated |
| After topping up water | Total Alkalinity, Calcium Hardness, pH | Fill water chemistry varies significantly by region; adding large volumes changes your pool’s balance in ways that depend on your local water supply |
| Extended hot, sunny period | Free Chlorine, Cyanuric Acid | UV radiation accelerates chlorine consumption; even with CYA, FC can drop faster than expected during heat waves |
| After algae treatment or visible algae | FC, CC, pH daily until clear | Algae treatment and clearing requires sustained elevated FC; test daily to maintain the FC level required and ensure the treatment is progressing |
| Opening the pool for season | Full profile: all 8 parameters + LSI | Winter chemistry drift, debris decomposition, and evaporation all shift chemistry; start season with a complete baseline |
Understanding Your Results — What the Numbers Mean
Getting a test result is only half the picture. Here’s what each range means in practice, and the first corrective action each direction requires.
| Parameter | Too Low — What Happens | Ideal Range | Too High — What Happens |
|---|---|---|---|
| Free Chlorine | Bacteria survive; algae begins growing; water turns cloudy or green | 1–3 ppm | Eye/skin irritation; bleaches swimwear; wait before swimming |
| Combined Chlorine | Below 0.5 ppm is ideal — lower is always better | <0.5 ppm | Pool odor, eye irritation, poor sanitization despite FC — shock the pool |
| pH | Eye/skin irritation; corrosive water etches surfaces; chlorine too potent and burns off fast | 7.2–7.6 | Chlorine becomes ineffective; scaling; cloudy water; equipment damage |
| Total Alkalinity | pH bounces unpredictably; hard to hold in range | 80–120 ppm | pH locks high and resists lowering; cloudy water; scale formation |
| Calcium Hardness | Water etches plaster, grout, and metal fittings; foam formation | 200–400 ppm | White scale deposits on surfaces, waterline, heater, and equipment |
| Cyanuric Acid | Chlorine destroyed by UV rapidly; must add chlorine far more frequently | 30–50 ppm | “CYA lock” — chlorine neutralized even at high FC readings; drain and refill required |
| TDS | Very low TDS (soft water) is aggressive/corrosive | <1,500 ppm above fill | Water “used up”; chemical treatments unpredictable; partial drain and refill |
The pH-Chlorine Relationship — Why pH Must Be Corrected First
This is the sequencing rule that most new pool owners don’t learn until they’ve added chlorine multiple times without fixing a persistent water problem. Free chlorine’s effectiveness is directly tied to pH — not just generally, but dramatically:
- At pH 7.0: approximately 73% of chlorine is in its active (hypochlorous acid) form
- At pH 7.2: approximately 65% active
- At pH 7.5: approximately 48% active
- At pH 7.8: approximately 33% active
- At pH 8.0: approximately 20% active
A pool with “perfect” FC of 2 ppm at pH 8.0 has less than 0.5 ppm of actually-effective sanitizer — equivalent to a severely under-chlorinated pool. Before adjusting chlorine levels in response to a low reading, always check and correct pH first. An accurate FC test result is only meaningful when pH is within the correct range.
The CYA-Chlorine Relationship
Similarly, your required FC level depends on how much CYA is in the water. As CYA increases, the proportion of free chlorine available for immediate sanitization decreases. A simple guideline:
- CYA 0–20 ppm: FC target 1–2 ppm (minimal stabilization; chlorine very potent)
- CYA 30–50 ppm: FC target 2–4 ppm (standard range; the sweet spot)
- CYA 50–80 ppm: FC target 4–6 ppm (higher CYA requires more FC to maintain equivalence)
- CYA above 80 ppm: FC targets become very high; pool water has entered diminishing-returns territory; partial drain and dilution strongly recommended
The Langelier Saturation Index — The Test Most Pool Owners Don’t Know About
Individual parameter tests tell you whether each chemistry value is within range. But they don’t tell you how all those values interact with each other — and those interactions matter, particularly for pool surfaces and equipment longevity.
The Langelier Saturation Index (LSI), also called the Calcium Saturation Index (CSI), combines pH, water temperature, calcium hardness, total alkalinity, and TDS into a single number that tells you whether your water is in a balanced state, in a corrosive state, or in a scaling state.
The LSI scale:
- LSI between -0.3 and +0.3: balanced — water has negligible effect on pool surfaces and equipment
- LSI below -0.3: corrosive — the water is chemically “hungry” and will leach calcium from plaster, grout, and metal components to satisfy its mineral demand
- LSI above +0.3: scaling — the water has more calcium than it can hold in solution; excess will precipitate as white calcium carbonate deposits on every surface it touches
Why this matters when all your individual parameters look fine: it’s entirely possible to have pH 7.4, CH 250 ppm, and TA 90 ppm — all of which look correct individually — and still have a corrosive or scaling LSI. This happens because the LSI calculation accounts for water temperature (hot water holds less calcium in solution) and the interaction between all parameters together. A pool at 90°F with those exact numbers has a very different LSI than the same pool at 70°F.
How to calculate your LSI: you don’t need to do the math manually. Free LSI calculators are available online — AquaChek’s calculator at aquachek.com is a widely used, straightforward option. Enter your pH, temperature, calcium hardness, total alkalinity, and CYA readings, and the calculator returns your LSI with a balanced/corrosive/scaling interpretation.
When to calculate LSI:
- At pool opening each season (establish baseline before swim season)
- Monthly during active use
- When you notice white scale appearing on the waterline, spillways, or equipment
- When plaster shows pitting, etching, or staining that suggests corrosive conditions
- Before closing the pool for winter (balanced water protects surfaces during off-season)
- Any time you make a major chemistry adjustment that affects multiple parameters at once
The LSI is the single test result that no competitor pool guide adequately explains for home owners — which is exactly why it’s a meaningful differentiator for any pool owner who wants to go beyond basic maintenance and genuinely protect their pool investment long-term.
Saltwater Pool Testing — What’s Different
Saltwater pools are among the most misunderstood systems in residential pool ownership. The most common misconception is that a saltwater pool doesn’t use chlorine. It absolutely does — the salt chlorine generator (SWG) electrolyzes dissolved salt into hypochlorous acid, which is the same active sanitizer as in any other chlorine pool. The difference is generation method, not chemistry.
This means all the standard chemistry parameters (FC, CC, pH, TA, CH, CYA) still apply to saltwater pools and still require regular testing. Nothing about the SWG system eliminates the need for balanced water chemistry. What’s different is:
Salinity — The Additional Critical Parameter
SWG systems require a specific salt concentration to generate chlorine efficiently — typically 3,000–4,000 ppm, though the correct target varies by SWG model and manufacturer (always check your SWG manual for the specific target range). Too low: the generator produces insufficient chlorine and may display a “low salt” error. Too high: the water becomes corrosive and the SWG cell can be damaged.
Test salinity monthly with salt-specific test strips or a dedicated digital salinity/TDS meter. Most general pool test strips don’t test for salt, and liquid drop kits for standard chlorine pools don’t include a salt test — you need a specific salt-testing tool.
ORP Testing
ORP (oxidation-reduction potential) is particularly valuable in SWG pool management. An ORP reading of 650–750 mV indicates adequate sanitization activity in the water, independent of the specific ppm chlorine reading. This matters for SWG pools because the generator’s output varies with water temperature, cell efficiency, and salt level — ORP provides a direct read on whether the water is actually being sanitized rather than inferring it from a ppm reading alone.
pH Drift in SWG Pools
Salt chlorine generators produce hypochlorous acid with a slightly alkaline by-product, causing pH to gradually drift upward over time. SWG pool owners typically find they need to add pH reducer (muriatic acid or dry acid) more frequently than with traditional chlorine systems. Test pH more often — every 2–3 days rather than weekly — until you understand the rate of drift in your specific system.
Calcium Hardness in SWG Pools
Saltwater is calcium-hungry — it tends to leach calcium from surfaces more aggressively than standard chlorine water under equivalent conditions. Test CH monthly in SWG pools and maintain it toward the higher end of the 200–400 ppm range (ideally 250–350 ppm) to protect plaster, grout, and the SWG cell itself. Low CH in an SWG pool accelerates both surface etching and cell damage.
When Test Results Conflict — And What to Do
This situation happens to every pool owner eventually: your test strips say free chlorine is 3 ppm, but when you run the same water through your liquid drop kit, it reads 0.5 ppm. Or your digital tester says pH is 7.4 but the strip pad is matching the 7.8 color. Which do you believe?
The Accuracy Hierarchy
When two methods disagree, trust the more accurate method:
- Properly calibrated digital photometric tester — most accurate if calibration is current
- Liquid drop kit (FAS-DPD for chlorine, standard reagent for others) — trust over test strips when using fresh reagents and correct technique
- Standard liquid drop kit (DPD color comparison) — more reliable than strips under normal conditions
- Test strips — least accurate; use as a trend indicator rather than a definitive reading
Common Causes of Conflicting Results
Expired or degraded reagents: The most common cause of consistently wrong results from drop kits. OTO reagent (used for total chlorine) should be a clear pale yellow — if it’s turned orange or brown, it’s oxidized and will give incorrect readings. DPD tablets or liquid that has been stored in warmth or humidity degrades and produces unreliable colors. Replace reagents annually at minimum; check visual appearance before each use.
Very high chlorine bleaching test strips: When FC is above approximately 5 ppm, some test strip brands show a “washed out” or very light pad color rather than a dark color indicating high chlorine. This is a known limitation — the excess chlorine actually bleaches the reagent pad, making it look like low or no chlorine. If you suspect very high chlorine (after shock treatment, for example), dilute the water sample 50/50 with tap water, test the diluted sample, and multiply the result by 2. Or use the FAS-DPD liquid test, which doesn’t have this limitation.
Lighting conditions: As discussed in the sample collection section, reading test strips or drop kit comparisons in direct sunlight, fluorescent light, or colored ambient light shifts color perception enough to move a reading one or two chart positions in either direction.
Cross-contamination of test vials: If a test tube wasn’t fully rinsed between tests — or was rinsed with tap water instead of pool water — residue from the previous test or from the tap water treatment chemicals can skew results.
Resolution Steps
- Retest with the same method using fresh reagents or a new strip from a fresh package
- Retest with a different method — if drop kit and strip both give similar results, both are probably correct
- Check reagent expiry dates and visual condition
- Take a fresh sample to a pool store for professional testing as the tiebreaker
- If professional and home kit consistently disagree, replace your reagents before trusting your home kit results
Keeping a testing log over time is the most underrated pool management habit. When you record results consistently, patterns emerge: you can see if your home kit has been drifting gradually, whether the strip and drop kit readings have been diverging over weeks, and whether your pool store results align with your home tests. A simple spreadsheet or notebook with date, method, and all parameter readings is a powerful diagnostic tool that no amount of testing equipment can replace.
Test Kit Storage, Expiry, and Accuracy Maintenance
Even the best testing method gives wrong results if the reagents are degraded. This is one of the most consequential and least-discussed aspects of home pool testing.
How Reagents Degrade
Liquid reagents (DPD, OTO, phenol red): these chemical compounds break down under two main conditions — UV light exposure and heat. UV radiation cleaves the molecular bonds that give these reagents their color-changing properties; a bottle of OTO left on a pool deck in full sun for a season can become almost entirely ineffective, producing a pale non-reaction even when the water has significant chlorine. Heat accelerates all chemical reaction rates, including the unwanted degradation reactions inside the bottle. Liquid reagents stored at room temperature in the dark last 12–24 months; stored in direct sun or a hot environment, they may degrade within a season.
Test strips: the reagent pads on test strips are sensitive to moisture as well as UV. Humidity causes the pads to pre-react slightly with water vapor in the air, consuming some of the reagent capacity before a strip ever touches pool water. The result is strips that produce muted color responses — the chemical reaction that should produce a strong color change produces a weaker one because the reagent is partially spent. A strip from a container that was frequently opened and closed on a humid pool deck will give progressively lower readings over the course of the season even for the same water chemistry.
Visual Signs That Reagents Have Gone Bad
- OTO reagent (chlorine, clear pale yellow normally): turned yellow-orange or orange — oxidized, discard and replace
- DPD reagents (colorless normally): any color tint in the bottle indicates degradation
- Test strips: all pads develop identical or similar colors regardless of water chemistry; pads that should react to high chlorine appear the same as pads in chlorine-free water
- Phenol red (pH indicator, clear pale yellow normally): any pink or red tint before use indicates exposure to alkaline conditions
Storage Rules
- Store all testing supplies indoors — never permanently poolside
- Keep in a cool location away from direct sunlight and heat sources
- For test strips: reseal the container immediately after removing a strip; keep the desiccant packet in the container; never store with the lid loose
- For liquid reagents: keep caps tight; store upright; check the expiry date printed on each bottle before each testing season
- Replace liquid reagents at least annually, regardless of how much remains — the nominal cost of fresh reagents is far lower than the cost of acting on bad test results
Frequently Asked Questions
How often should I test my pool water?
During active swim season, test free chlorine and pH at least twice per week — more often during very hot weather, after heavy rain, or after a pool party. Test total alkalinity and combined chlorine weekly. Test calcium hardness, cyanuric acid, TDS, and phosphates monthly. At minimum, test before adding any chemical and again 4–6 hours after to confirm the effect. When in doubt, test — it takes 30 seconds with a test strip and the information is genuinely valuable.
What is the most accurate way to test pool water at home?
A properly calibrated digital photometric tester is the most accurate home option. A close second is a liquid drop kit using the FAS-DPD method for chlorine — this method is accurate at any chlorine concentration and doesn’t suffer from the bleaching problem that affects color comparison tests at high FC. For most residential pool owners, a quality liquid drop kit (Taylor K-2005 or K-2006) used with correct technique gives results accurate enough for confident water management at a fraction of the cost of digital equipment.
Why does my pool smell like chlorine even when the test says there’s enough chlorine?
That strong “pool smell” is almost certainly not free chlorine — it’s chloramines (combined chlorine), which form when free chlorine reacts with nitrogen compounds from swimmers. A pool that smells strongly like chlorine usually means there is too little free chlorine relative to the demand, allowing chloramines to accumulate. The fix is the opposite of what the smell suggests: shock the pool with a large dose of chlorine to break down the chloramines. A properly sanitized pool with healthy free chlorine and low combined chlorine has very little noticeable odor.
Can I test pool water without a kit?
You can make rough observations without a kit — cloudy water, green tints, a strong chloramine smell, or slippery surfaces all signal chemistry problems. Visual inspection has real informational value. But you cannot reliably determine specific chemical levels without a test. Attempting to manage chemistry by visual observation alone typically leads to guessing on chemical additions, which often makes the underlying problem worse. Even basic test strips provide vastly more information than visual inspection for very little cost.
Why are my test strips giving different results than my drop kit?
Trust the drop kit result — liquid reagent kits are significantly more accurate than test strips. Common reasons for strip-vs-kit disagreement: expired or humidity-degraded test strips; reading the strip in direct sunlight (bleaches colors to appear lower); very high chlorine bleaching the FC pad to appear falsely low; or cross-contamination in the drop kit test tube. If fresh strips and a fresh drop kit continue to disagree, get a pool store test as the tiebreaker. Going forward, use the drop kit as your primary weekly testing method and strips for daily quick checks.
What should I test for in a saltwater pool?
Everything you’d test in a standard chlorine pool — free chlorine, combined chlorine, pH, total alkalinity, calcium hardness, and cyanuric acid — plus salinity (the salt level that powers your generator, typically 3,000–4,000 ppm per your SWG manual). pH needs more frequent attention in SWG pools because salt chlorination causes gradual upward drift. Calcium hardness should be maintained toward the higher end of the normal range because saltwater is more calcium-hungry than standard chlorine water.
How long after adding chemicals should I wait to test?
Run the pump for at least 4–6 hours after adding any chemical before testing to confirm its effect. For granular chemicals added directly to the pool, 4 hours of circulation is the minimum. For liquid chemicals, the wait can be shorter (1–2 hours) since they disperse more quickly, but 4 hours is still the recommended standard for accurate results. For shock treatments (high-dose chlorine addition), wait until FC has dropped back into the 1–4 ppm range — which may take 24–48 hours — before comparing results to your normal baseline.
What is the Langelier Saturation Index and do I need to know about it?
The LSI is a calculated value that combines pH, temperature, calcium hardness, total alkalinity, and TDS into a single number indicating whether your water is balanced, corrosive, or scaling. Individual parameter tests can all be “in range” while the LSI reveals that the combination of those values is still damaging your pool surface or equipment. You don’t need to know the math — free online calculators (aquachek.com) do the calculation when you enter your test readings. Calculate your LSI monthly during swim season, at pool opening and closing, and any time you see scale formation or surface pitting. It’s the one test result that tells you things no individual parameter test can.
Quick-Reference: Ideal Pool Water Chemistry Ranges
Bookmark this table or print it and keep it with your test kit. These are the targets to maintain and the ranges that require immediate attention.
| Parameter | Minimum | Ideal Range | Maximum | If Out of Range |
|---|---|---|---|---|
| Free Chlorine | 1 ppm | 1–3 ppm | 5 ppm (for swimming) | Low: add chlorine. High: wait, don’t swim above 5 ppm |
| Combined Chlorine | 0 ppm | 0–0.2 ppm | 0.5 ppm | Above 0.5 ppm: shock the pool regardless of FC level |
| pH | 7.2 | 7.2–7.6 | 7.8 | Low: add sodium carbonate. High: add muriatic acid or dry acid |
| Total Alkalinity | 80 ppm | 80–120 ppm | 150 ppm | Low: add sodium bicarbonate. High: dilute with fresh water + lower pH |
| Calcium Hardness | 200 ppm | 200–400 ppm | 500 ppm | Low: add calcium chloride. High: partial drain and refill |
| Cyanuric Acid | 30 ppm | 30–50 ppm | 80 ppm | Low: add stabilizer. High (above 80): partial drain and refill |
| TDS | — | <1,500 ppm above fill water | 2,000 ppm above fill | High: partial drain and refill with fresh water |
| Salt (SWG pools) | Per SWG manual | 3,000–4,000 ppm (typical) | Per SWG manual | Low: add pool-grade salt. High: partial drain and refill |
| LSI | -0.3 | -0.3 to +0.3 | +0.3 | Below -0.3: corrosive — raise CH or TA. Above +0.3: scaling — lower pH or CH |
Testing your pool water isn’t a chore — it’s the 30-second investment that prevents every major pool problem from ever developing in the first place. A pool that’s tested consistently, with the right method and correct technique, will almost always be a pool with clear water, comfortable swimming, and predictable chemistry that’s easy to maintain season after season.
If your filter pressure is staying high despite balanced water chemistry, see our guide on why sand filter pressure stays high after backwashing.
Not sure which specific kit to buy? See our guide to the best pool test kits and testers for picks by testing method and budget.